So I had some extra boxes of super sculpy sitting around collecting dust on my work space so i thought – Now would be a good time to really try and document my own sculpting process from start to finish. There used to be so many helpful threads i had bookmarked for my own reference, but sadly they've been archived. i thought i'd try to bring back some of the info with a WIP thread of my own using some of the tips and techniques i learned from them. So here goes nothing....
When I first started this was the ultimate resource for me:
http://www.statueforum.com/showthread.php?t=25103
So this Work-in-progress "WIP" thread shows pretty much how I create all my sculptures (Using Super Sculpy). I'm sure there are better and more efficient ways of going about creating a sculpture, but this is what works for me.
THE SUBJECT MATTER
I'm going to skip this because most of you already know what you want to sculpt from the get go. My only suggestions to those of you completely brand new to the hobby is to:
• start out simple. Choose a character that is basically a "Nude" figure, i.e. Green lantern, superman, batman, etc. When creating a figure female/male ANATOMY is key.
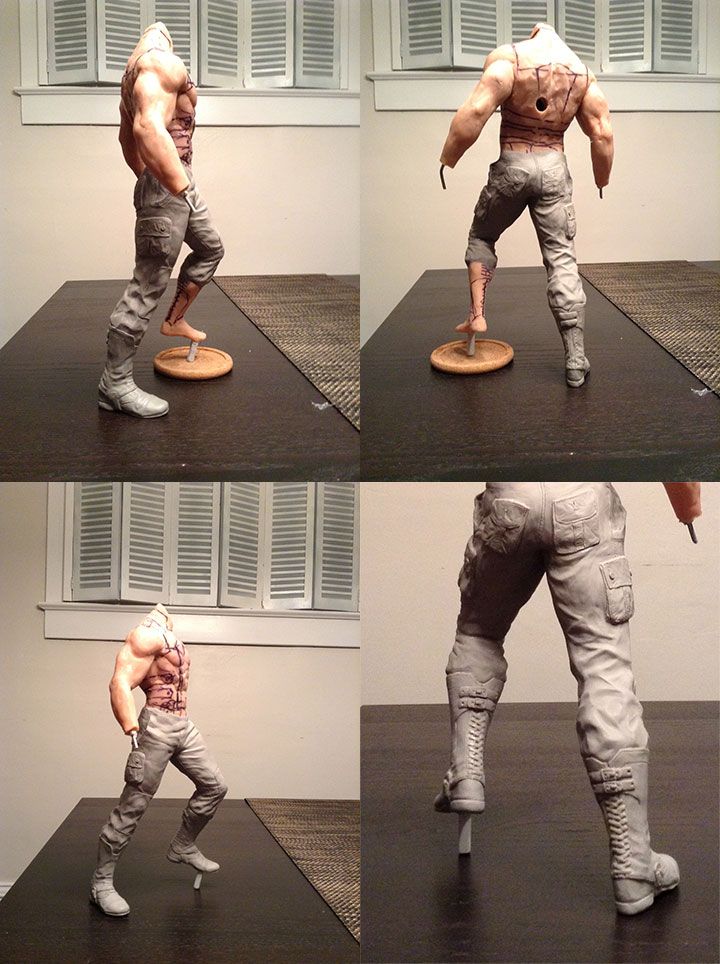
• After you get the anatomy down then practice sculpting clothing, belts, accessories, whatever on top of the piece.
• Museum poses are best for beginners IMO. Once you get the anatomy of a static pose down, then move on to more advanced poses.
• Use a reference sketch (360 turnarounds if you can get them are the best) and reference photos, the internet is full of them.
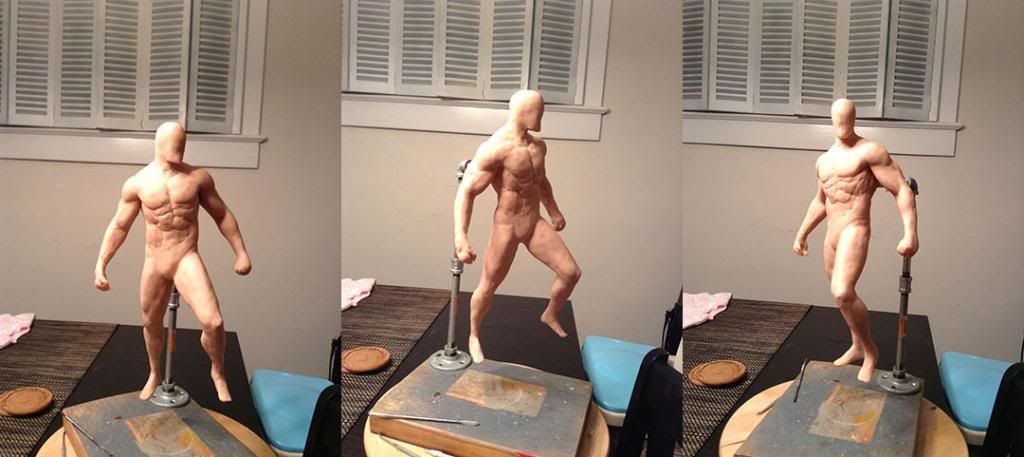
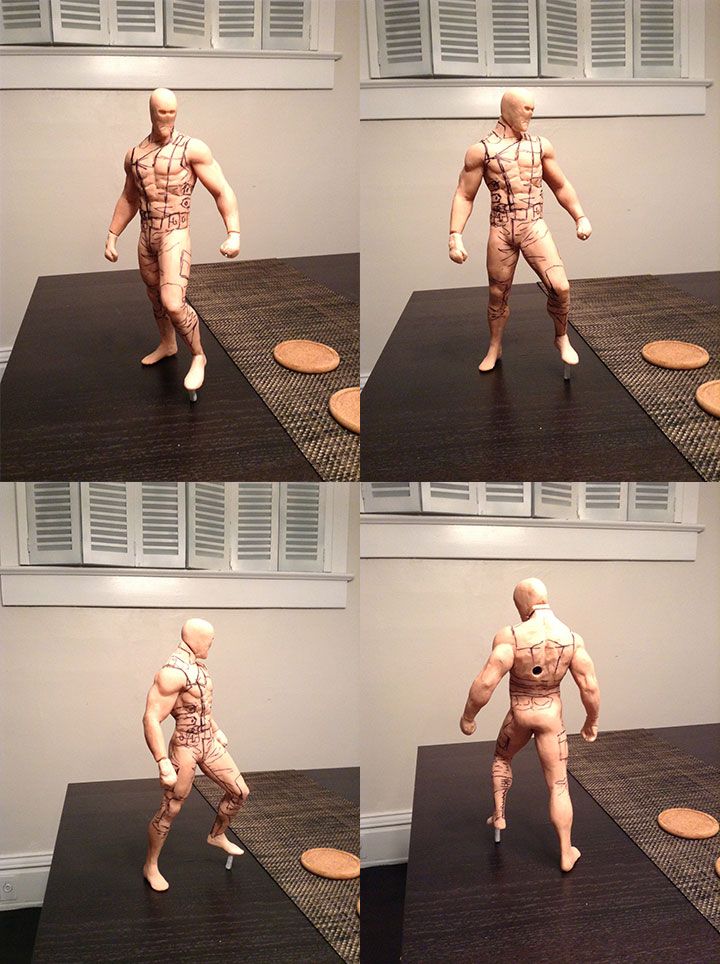
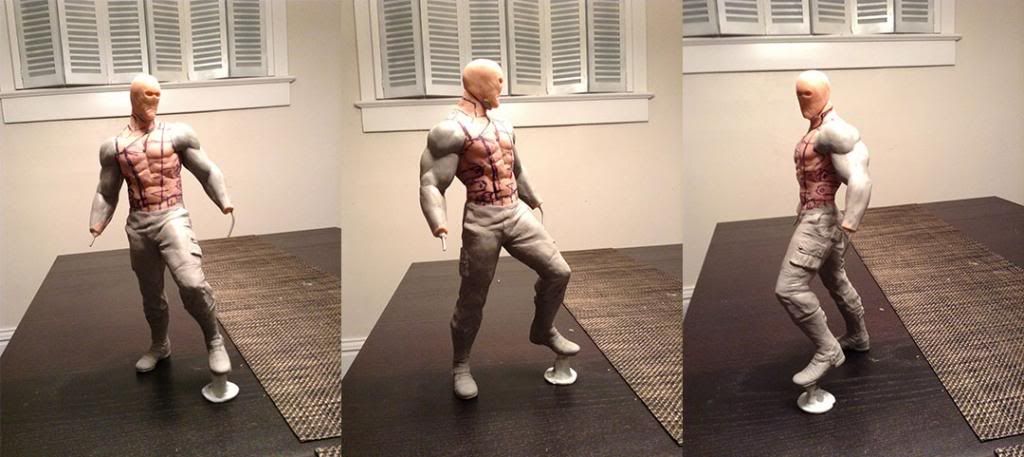
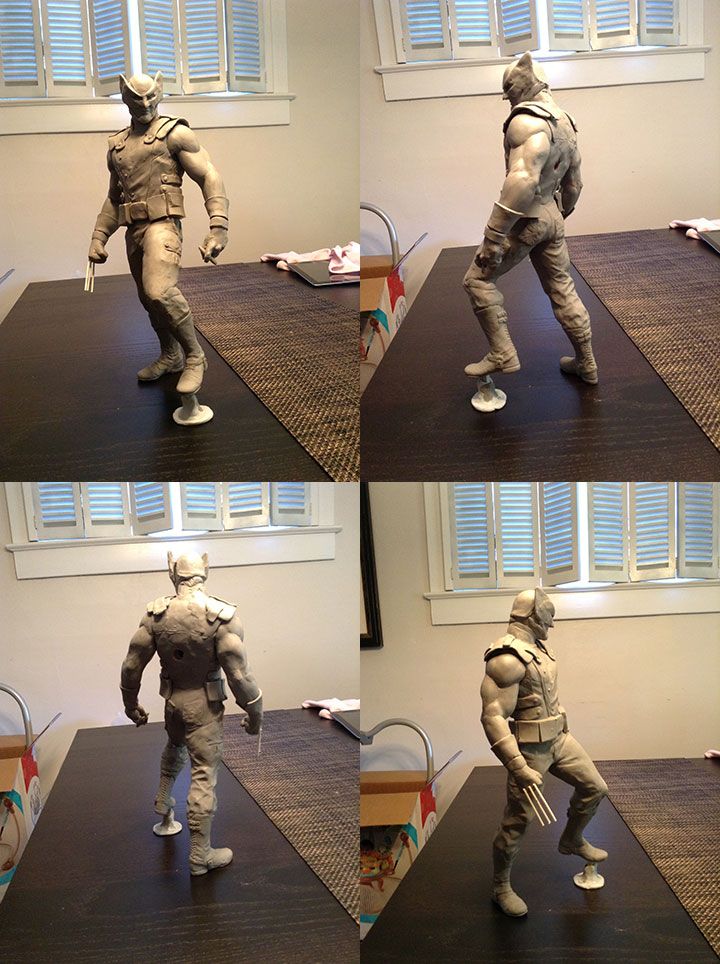
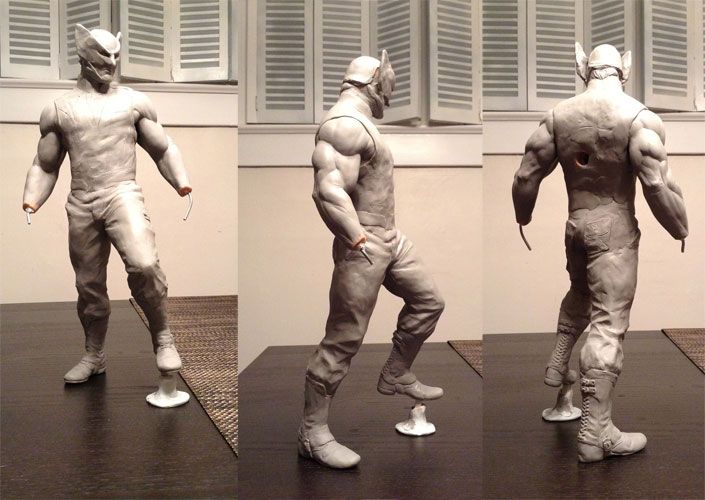
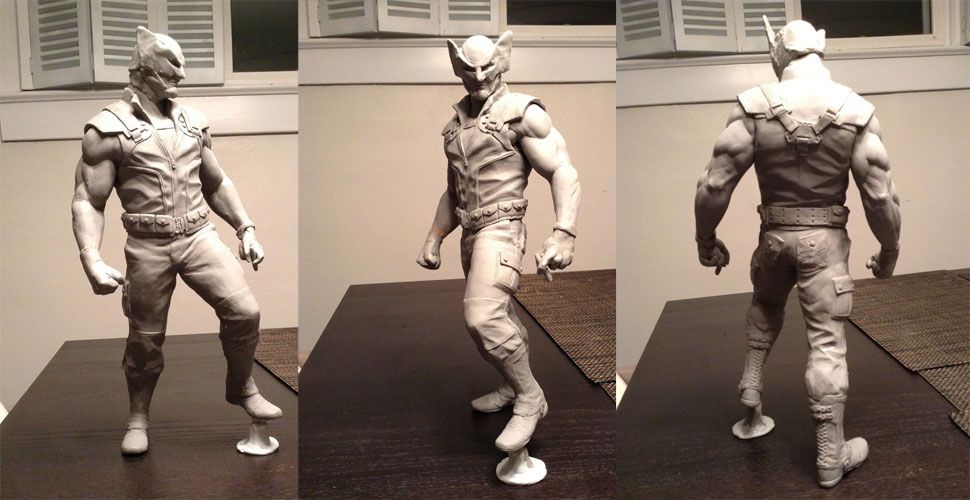
For this sculpture I got my inspiration after Captain America:TFA. I decided to create my take on Canada’s supersoldier “Wolverine” that would exist in the same universe.
THE ARMATURE
I’ve been making my armatures the same way now for the last few years. Making the armature varies from person to person, but here is my process.
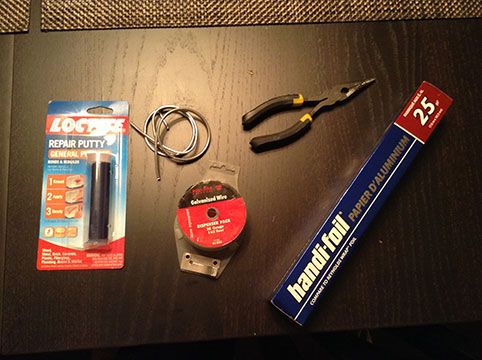
• Epoxy Putty
• Armature Wire
• Thin Wire
• Pliers
• Foil
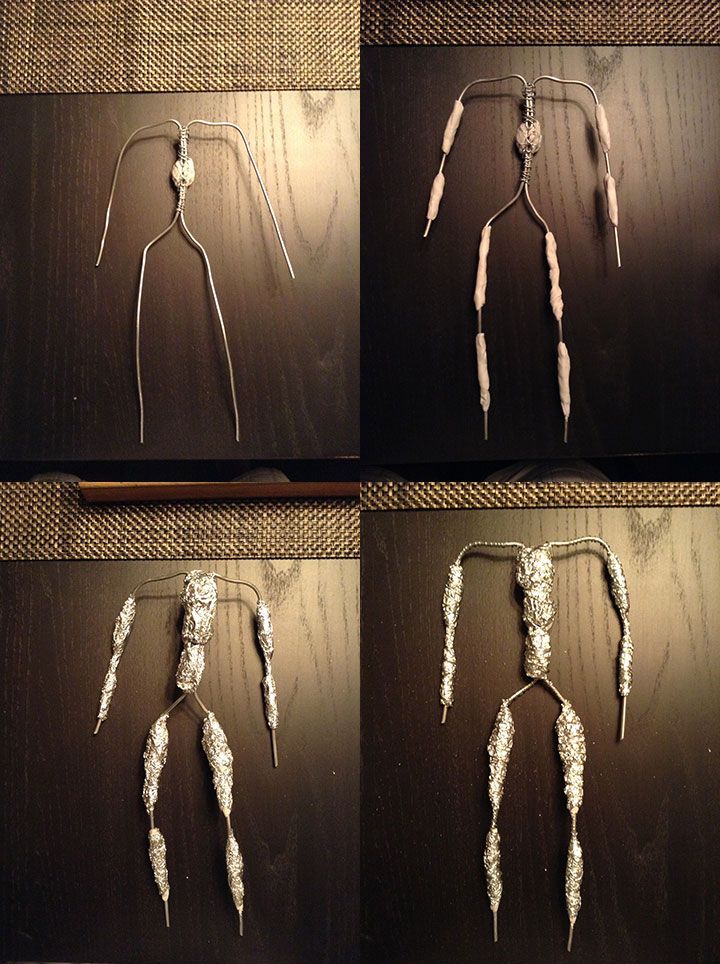
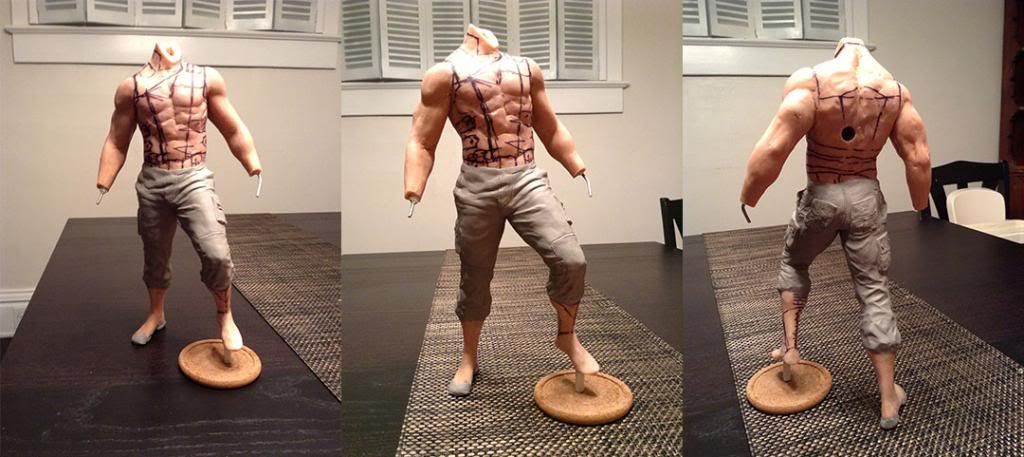
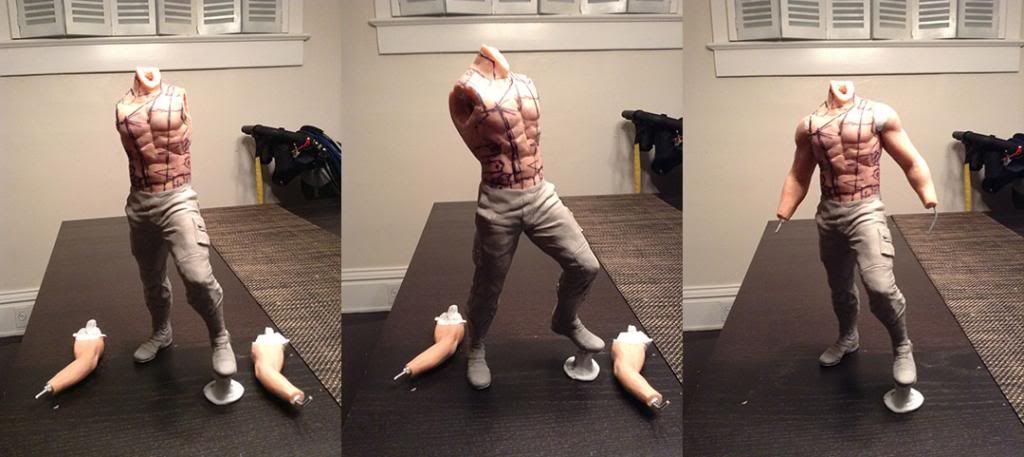
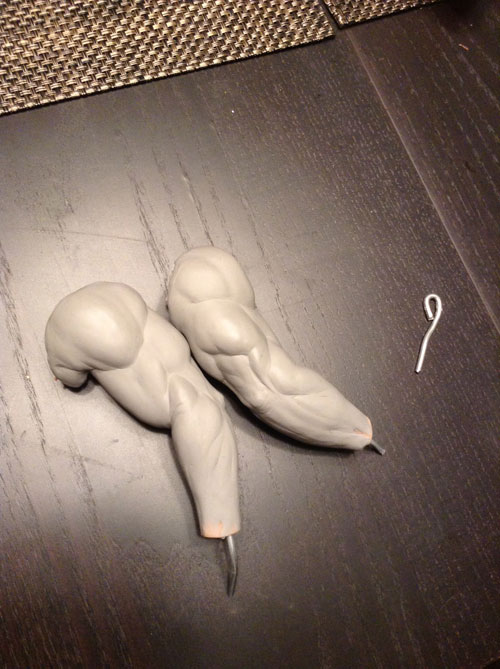
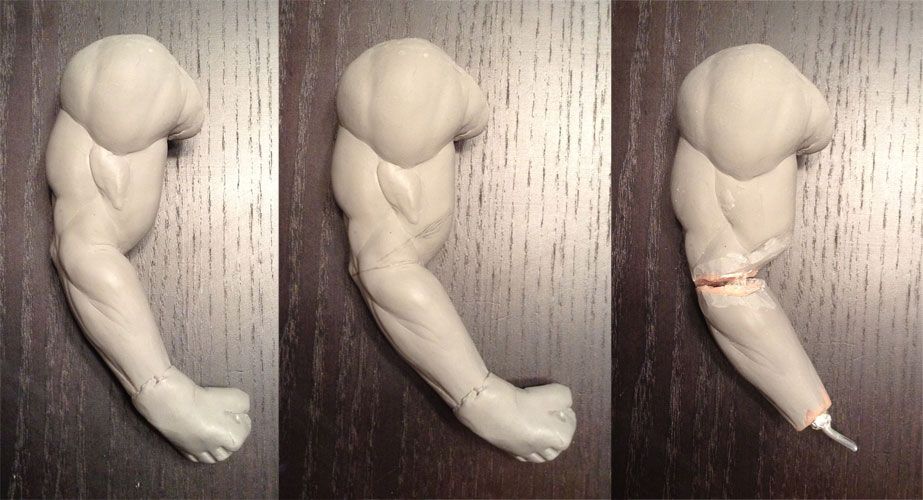
I first cut the wire to scale ( I use the reference art provided in the sculptors pitstop section). I then apply the 2-part epoxy putty to the areas that I want to stay rigid leaving the joints still very posable. My next step is to lightly bulk up the armature with Aluminum Foil. After the foil is applied I then lash everything together with a thin wire.
APPLYING THE CLAY
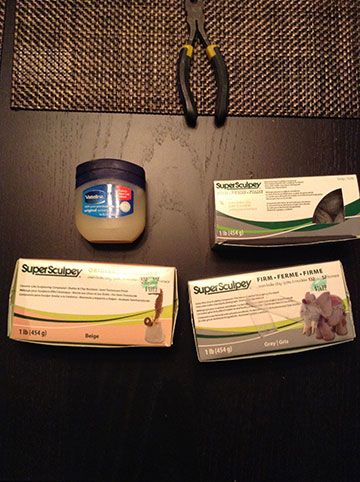
• Super Sculpy (Pink)
• Super Sculpy Firm (Grey)
• Vaseline

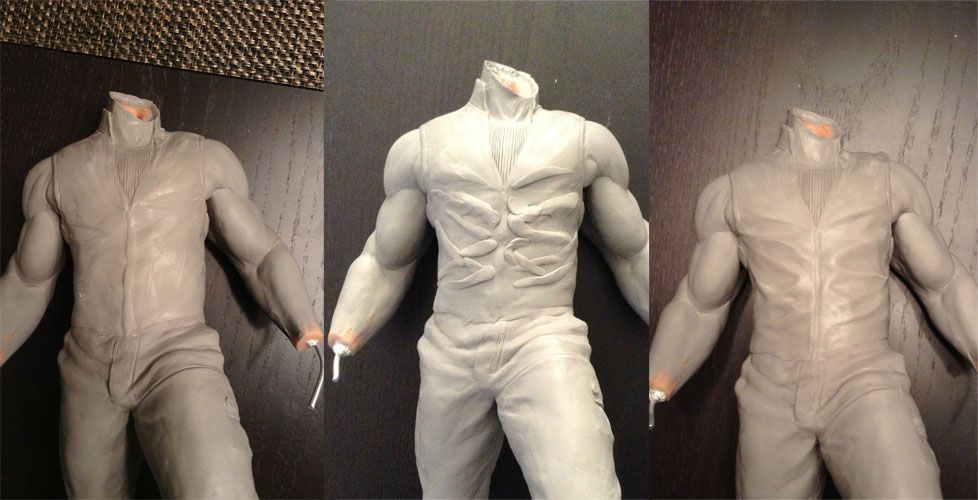
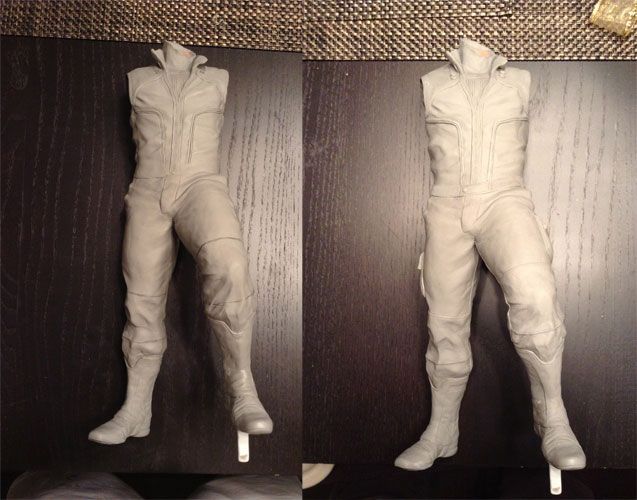
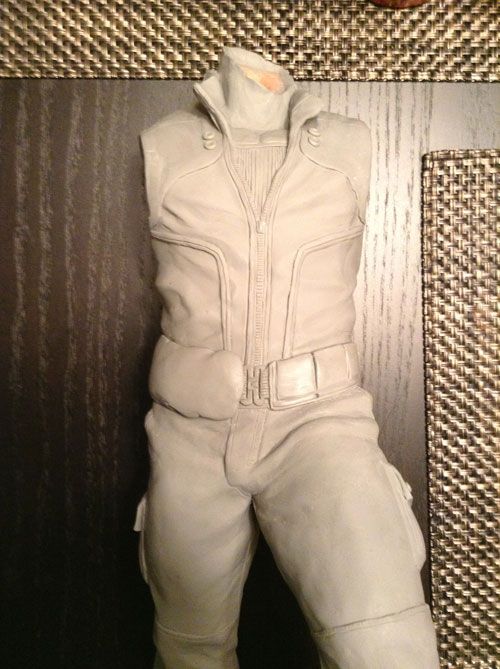
I start by applying the Super Sculpy to the armature. At this point im just trying to get the whole thing covered. After everything has a solid coating, i then loosely begin blocking out the general anatomy. I'm not really looking into creating any kind of pose right away, just trying to make sure everything is in proportion with each other.
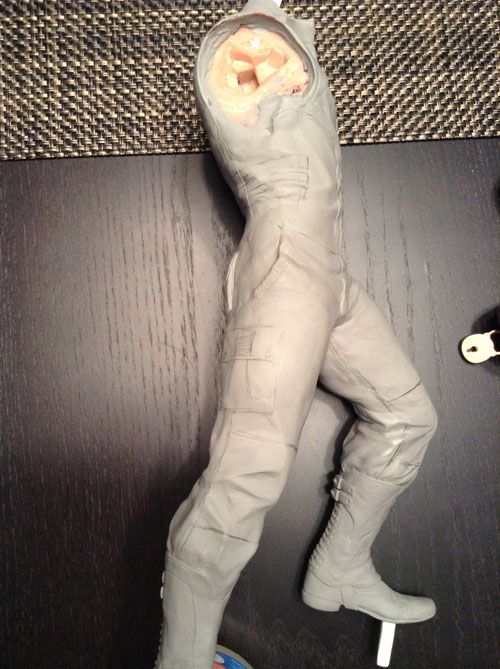
See post #16 for info on Support Tree for Armature


 nice! So their is hope to seperate and key my Juggy's arms

