 |
|
 05-24-2012, 12:13 PM
|
#1
|
|
A day without sunshine is like... night.
Join Date: Oct 2010
Location: TX
Posts: 283
|
How do I make joint keys?
I am not sure what they are called but i am referring to that connection that is made to join two parts of a sculpt together, Like when you cut your sculpt into different parts for molding. Example I have a sculpt im working on and i used rectangular brass piping to make the arms detachable and workable the pipe goes from one side of the body to the other, I bake it and now the body and arms are cured (hard) so i have the body with a square cavity and an arm with a square peg sticking out. Now i want to have one of those neat joint keys you see on those pro sculpts that have like a cubic indention and cubic connection that fit perfect together, How do I do that?
|

|

|
|
05-24-2012, 02:45 PM
|
#2
|
|
Cosmic Painter
PainterModerator
Join Date: Mar 2006
Location: In Da Studio!
Posts: 15,780
|
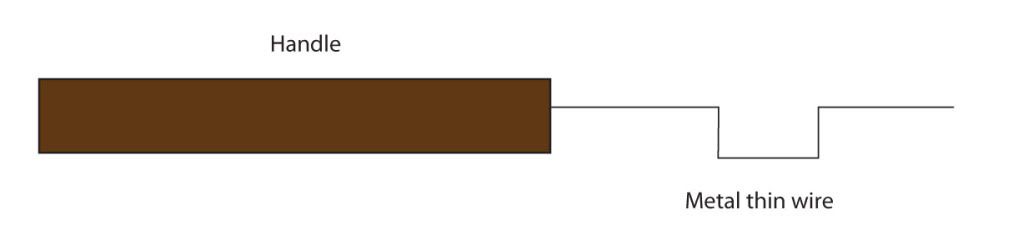
Its a key tool, i dont remember the name but its thin and shaped like a C of sorts. Then you cut into the joint and turn it and its keyed.
Or you can just wire cut off the joint and get metal square rods from home depot or hobby shops, cut them down and add them into that joint.
|
|
|
|
|
05-24-2012, 04:50 PM
|
#3
|
|
A day without sunshine is like... night.
Join Date: Oct 2010
Location: TX
Posts: 283
|
Thanks for your rely Vince. Would you happen to have a picture of the tool. I would really appreciate it if you could up load it. But this tool, it would be used after the sculpt is hard right?
|
|
|
|
|
05-24-2012, 05:08 PM
|
#4
|
|
Kiss my shiny metal arse!
Join Date: Apr 2008
Posts: 4,105
|
I've been curious about how to do this too. Will be keeping tabs on Vince's info 
|
|
|
|
|
05-24-2012, 07:01 PM
|
#5
|
|
Cosmic Painter
PainterModerator
Join Date: Mar 2006
Location: In Da Studio!
Posts: 15,780
|
Problem with that is i don't know the name of the tool just sorta remember what it looked like
Sorta had a and like this, so you cut in, and twist some how and cut out and it keys. Has to be thin too to cut the clay. I think you can make one yourself.
|
|
|
|
|
05-25-2012, 04:11 AM
|
#6
|
|
Kiss my shiny metal arse!
Join Date: Apr 2008
Posts: 4,105
|
So that creates the concave/female part of the joint. What about the male part?
|
|
|
|
|
05-25-2012, 08:38 AM
|
#7
|
|
A day without sunshine is like... night.
Join Date: Oct 2010
Location: TX
Posts: 283
|
Thank you you for the pic Vince and for taking the time to reply we are a little closer to finding our answer. Jolly, I think i got a pretty good idea how to sculpt the "male" connection, after the cut would be made with the tool you can just add some clay to the part were you want the connection to be and push it in the cut like a mold then just let the clay cure. But this is just my idea. Vince, one last question from me sir, the tool would it cut hard clay like sculpey after its baked?
|
|
|
|
|
05-25-2012, 09:30 AM
|
#8
|
|
Cosmic Painter
PainterModerator
Join Date: Mar 2006
Location: In Da Studio!
Posts: 15,780
|
see im not sure on that but i think baked you then can't do it, but I'm not sure at all. Best to contact a sculptor/producer who does kits and ask them.
Im just going off memory of something some one told me years ago and showed me a tool.
|
|
|
|
|
05-25-2012, 06:55 PM
|
#9
|
|
Sey hallo to my lille fren!
Join Date: Nov 2009
Posts: 133
|
Maybe this idea will help and it's super easy to do.
1. Cut off the piece in question.
2. Using whatever tool that is appropriate for the material used for the sculpture, dig out an asymmetrical recess in the bigger part. Ensure there are no undercuts. For instance if its' a leg cut from a torso, carve out the recess from the torso section.
3. Cover the recess with cling wrap, making sure to press it into the full recessed area.
4. Add a fresh lump of softened material to the recessed area filling it in....on top of the cling wrap.
5. Press the exposed part onto the freshly filled recess in the correct position so that the two materials bond.
6 let the piece, cool/harden, cure or whater is necessary for the material.
7. Pull the smaller part from the bigger part using the cling wrap to pull the two apart.
8. Once separated, remove cling wrap completely.
You now have a keyed male and female joint that can only be reassembled in the original orientation.
This key can be as ugly as you want because it's purpose is alignment and will not be visible once reassembled.
Not very fancy, but easy and effective.
|
|
|
|
|
05-25-2012, 07:38 PM
|
#10
|
|
Yeah, I spend WAY too much time here!
Join Date: Sep 2006
Location: NJ
Posts: 14,036
|
Don't make keys. Just pick the lock to steal your Dads joints.
|
|
|
|
|
|
 Posting Rules
|
You may not post new threads
You may not post replies
You may not post attachments
You may not edit your posts
HTML code is Off
|
|
|
|
All times are GMT -4. The time now is 11:47 PM.


